Construction Steps — Overview
1) Cutting and joining the PVC panels
The backing wall is formed from three individual panels (1220×600×10 mm seems to be an industry standard for the individual panels), one of which is cut in half along its long side. (Details are provided under Cuts & Dimensions)
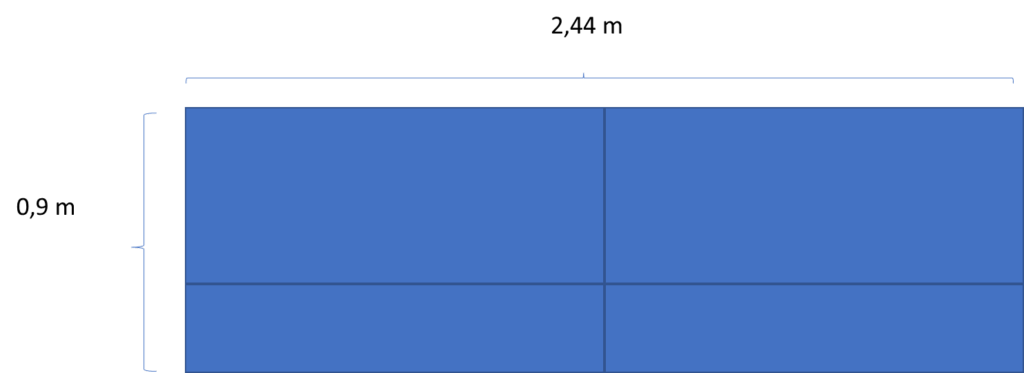
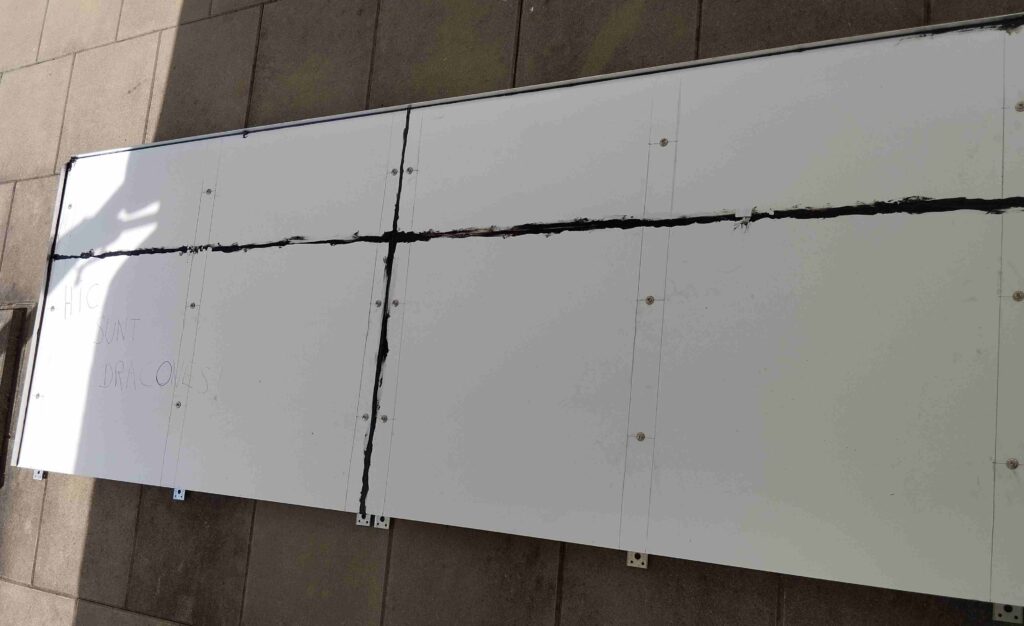
The panels are bonded using rain gutter adhesive. For bonding, the panels must be pushed flush against each other. The adhesive requires several hours to cure. Once dry, it is recommended to additionally seal the joints with silicone.
2) Fitting the aluminium frame
An aluminium profile along each side prevents water from escaping laterally. An additional profile along the top edge is optional – it gives the wall a framed, picture-like appearance – but requires mitre cuts. To mount the frame, a thin layer of silicone is applied to the angle profiles and these are then pressed firmly onto the PVC panel.
3) Assembling the wooden frame
The wooden frame consists of 6 vertical battens and 2 horizontal battens. In the upper section the battens are held together by the cabinet hanging brackets (that came with the wall mounting rail). In the lower section they are connected using 6 joining plates, which are left slightly proud so that an additional batten – which will later carry the rain gutter – can be attached in the next step.
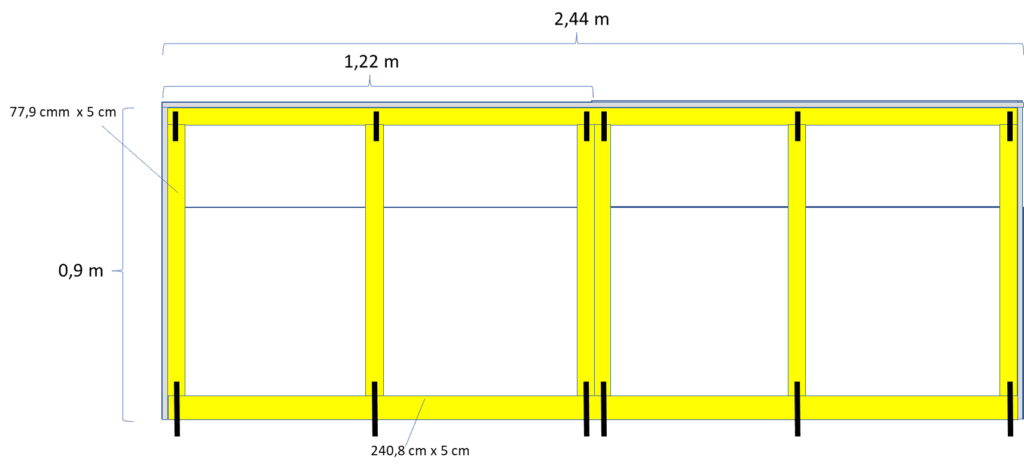
3) Attaching the PVC panels to the wooden frame
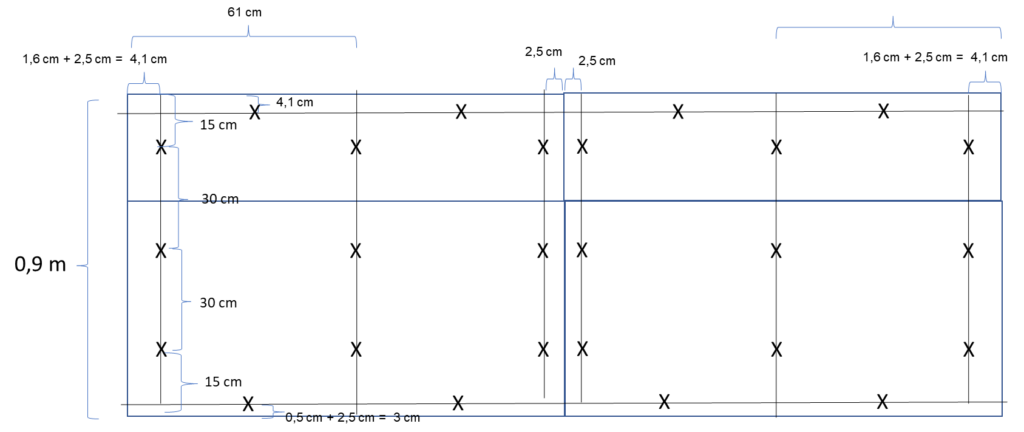
The bonded panel assembly is screwed onto the wooden frame using self-sealing screws of the type commonly used in plumbing and sheet metal work. Pilot holes must be drilled beforehand to prevent the PVC from cracking. In the diagram below, each X marks a drill hole for attaching the screws.
4) Installation of the fleece
The fleece is cut into strips matching the width of the wall. Attention should be paid to the fibre orientation: the fibres should run horizontally so that liquid does not drain too quickly downward, allowing it to be absorbed more effectively by the plants.
The fleece is smoothed flat and then stapled in place. Approximately 50 staples per m² should be expected. A small margin was left at all edges. To trim the overhanging fleece, a disposable scalpel and scissors were used.
Once the first layer of fleece has been applied, the second layer is attached in exactly the same way – stapled offset relative to the first layer in order to maximise the number of fixation points across the surface.
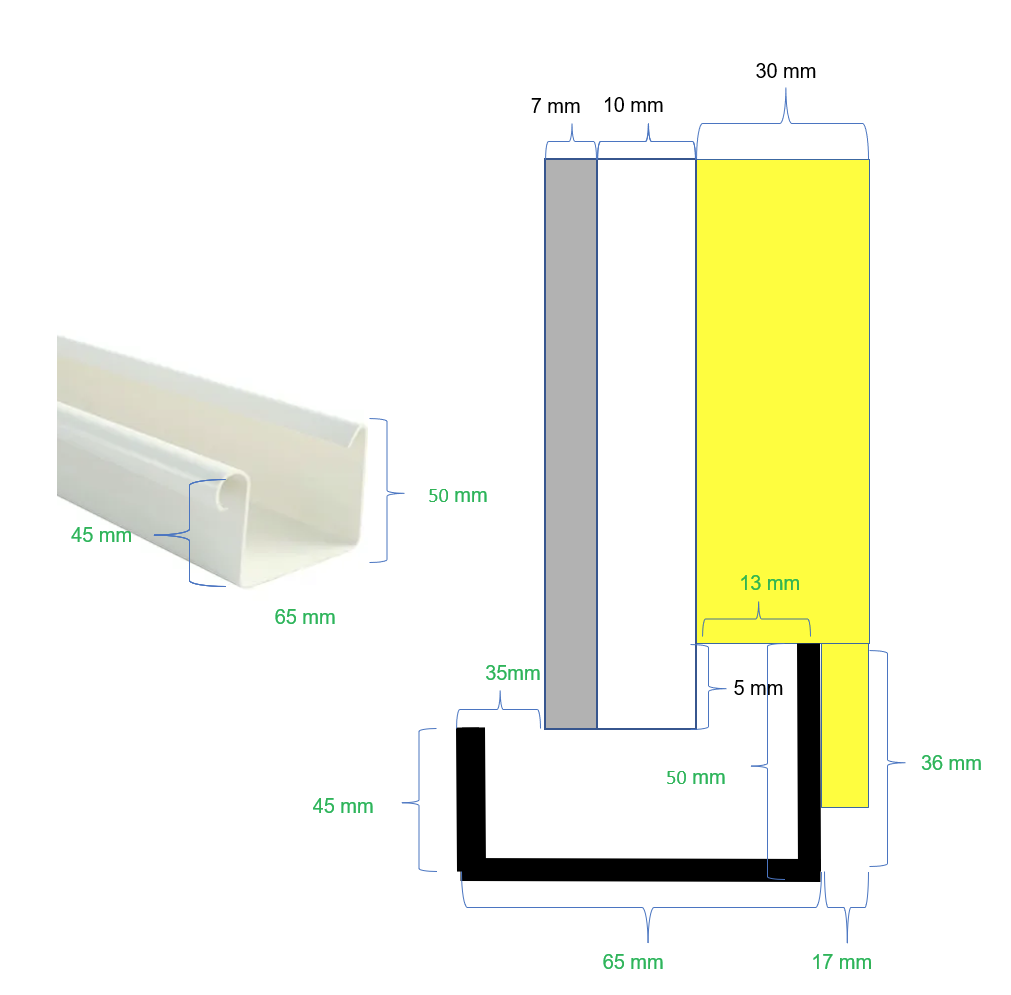
5) Preparing and mounting the rain gutter
Before installing the gutter, I heated one end section with a heat gun and pressed a glass into the softened material to form a depression. The glass was chosen to roughly match the diameter of the 3/4″ tank bulkhead fitting that would be installed at this position. Once cooled, the depression can be drilled through and the bulkhead fitting screwed in place. The joint is additionally sealed with silicone.
The gutter is then cut to length and the end caps are fixed in place using gutter adhesive and silicone.
To mount the gutter, silicone is applied to the wooden batten and the gutter is placed on top so that its upper edge sits flush with the batten surface. The overhangs on both sides should be equal so that the batten sits centred beneath the gutter.
The batten with the mounted gutter can then be connected to the joining plates left protruding in the previous step. It is worth introducing a slight slope at this stage to ensure that no liquid pools in the gutter during operation.
6) Installation of the Distribution Pipe
The distribution pipe is relatively rigid, so I used it only directly at the wall itself. For the supply and return lines to the tank I used a more flexible and visually cleaner white hose (one originally intended for dental surgery installations).
Two sections of distribution pipe are required: a vertical section, which I attached to the flat outer face of the wooden frame using pipe clips, and a horizontal section that runs along the top of the fleece. Small stapled tabs cut from leftover fleece material can be used to form retaining loops that hold the pipe against the wall surface.
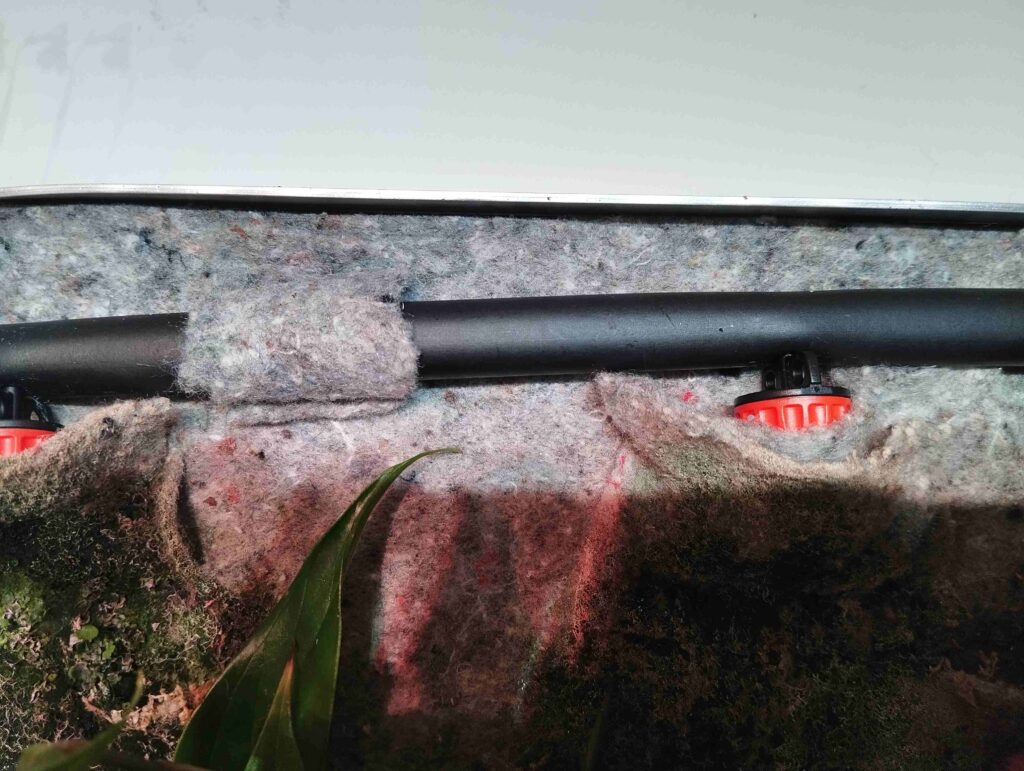
The most challenging part is the transition from the vertical to the horizontal section. For this I cut three 90° push-fit connectors for PE pipe to the required angles, sanded the mating surfaces, and then welded them together using a heat gun. The joints were subsequently sealed with silicone for additional security.
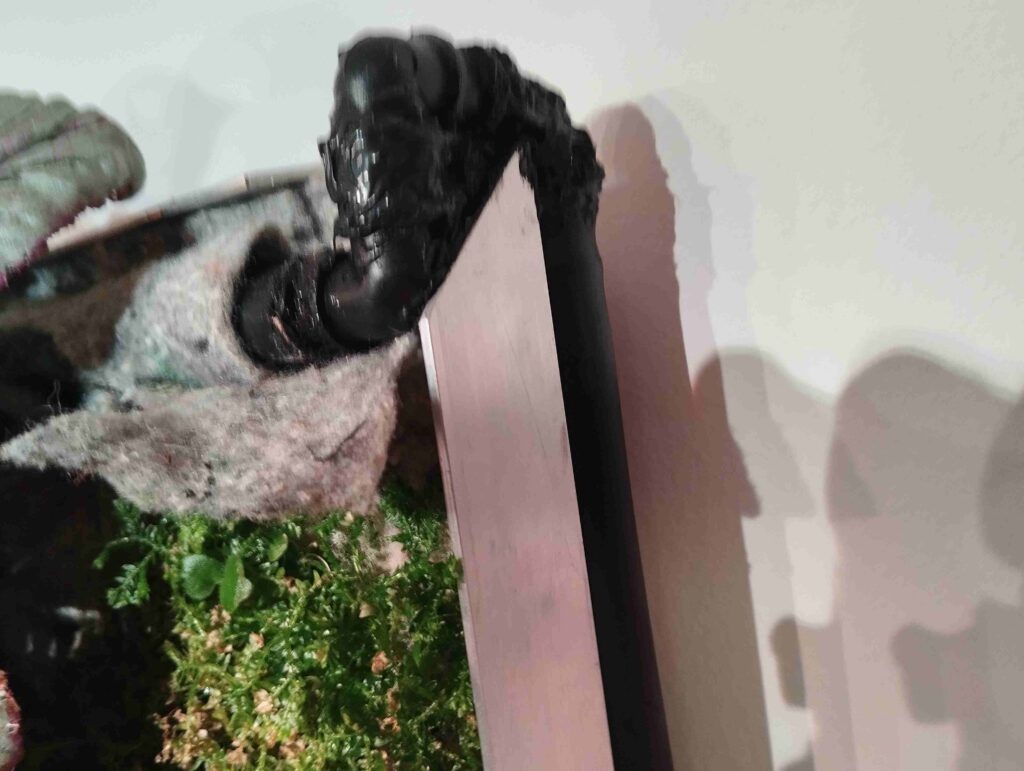
The drippers are installed at regular intervals – every 17 cm (7 cm to each end). To fit each dripper, a purpose-made punch tool from Claber is used to pierce a hole in the distribution pipe, into which the dripper is then pressed.
To ensure the water runs down along the wall surface, I made pockets for the drippers from leftover fleece material by stapling a strip into a U-shape. The dripper can be inserted from above and pulled out again for inspection purposes.
The open end of the vertical distribution pipe is fitted with a PE pipe end cap with quick-release connector. The lower end of the horizontal section is fitted with a PE pipe clamp connector with female thread.